Ingredients
150 grams unsifted whole wheat Red Fife flour
125 grams cold unsalted butter, cut into 2”cubes
56 grams sugar
5 grams salt (1 tsp)
13 grams cold water (1 tbsp)
Makes one 9” pie crust.
Directions
Put all of the ingredients, except for the water, into the bowl of a food processor fitted with the blade attachment.
Turn the food processor on and immediately add the water through the hole in the top.
Process until the dough comes together and just starts to follow the blade around in a ball. Watch closely because you don’t want the dough to get over processed as the butter will become too warm and hard to work with. You may want to stop the food processor and use the pulse setting when you are nearing the end. You will still see some sugar and little bits of butter near the top of the dough ball, those can be mixed in with your hands.
Take the dough out of the food processor and place it on a piece of parchment paper roughly the size of a sheet pan.
Using your hands, shape the dough ball into a flat disc about 5 inches in diameter. Then sprinkle flour evenly on both sides of the dough ball and on top of the parchment.
Troubleshooting: If the dough had been in the food processor too long, the butter will be warm and sticky.You can place the disc inside of the refrigerator for a few minutes to make it easier to work with, but don’t wait too long as it will get hard to roll out if it is too stiff.
Using a rolling pin, gently start rolling the dough into an even circle about an inch larger than your preferred pie pan on top of the parchment paper. Take care to only roll the rolling pin in one direction because the dough can stick to the rolling pin if you use a back and forth motion. Use more flour if necessary and make sure that the dough is rolled out evenly without areas that are thinner than others. You can always start over, it won’t make the dough tough.
When your dough circle is complete, place your pie pan on top of the dough, adjusting it so it is in the middle of the dough circle. The crust should overlap the edge of the pan by about 3/4 of an inch. Then, slide one hand under the parchment paper and place your other hand on the back of the pie pan. Flip the parchment and pie pan so that you end up with the pie pan on the counter with the crust positioned in it and the parchment on the top. Remove the parchment and very gently press the crust into the bottom and sides of the pie pan. If the crust rips, don’t worry just press it back together. Then use a knife to follow the rim of the pie pan, cutting away any excess pie dough.
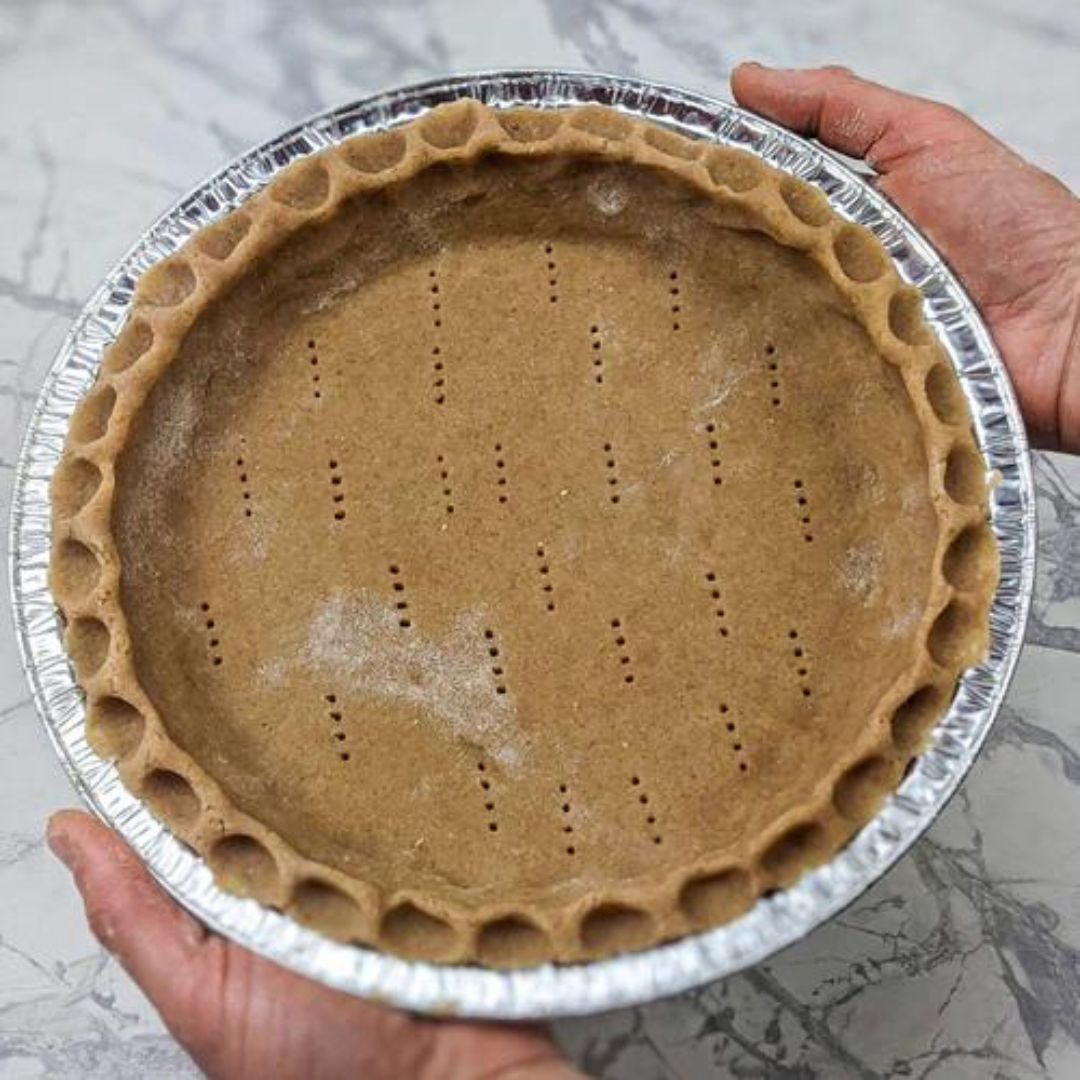
Finally, fold the edge of the pie dough under itself so that you have a lip around the rim of the pie pan made up of two layers of pie dough.


This prevents the pie dough from over baking on the edge of your pie pan and creates an opportunity for a little decoration.
My favourite way to beautify the lip of the pie crust is to use the pointer finger of my left hand to hold the inner edge of the lip in place while I use my thumb on my right hand to make little indents in the pie dough. You can decorate the lip in other ways but because this dough is so buttery, it may melt and lose much of its shape in the oven.


Prick the bottom of the pie crust with a fork in about 4 places to prevent air pockets under the crust to cause uneven baking.
The pie crust is now ready to be frozen for later use or chilled and then filled with your favourite filing. Before baking, it is best to chill the dough thoroughly so that the butter-rich dough holds its shape better in the oven.
If you are using an aluminum (disposable) pie pan, place a thick-bottomed baking sheet in the oven while it is preheating. Then place to it pie directly onto the baking sheet in the oven to bake. This helps to evenly distribute the heat while baking. It can also be helpful to avoid pie filling drips in your oven and to make taking the pie out of the oven easier.
Although some pie fillings do require the crust to be blind baked (like a lemon meringue or similar filling that doesn’t need to be cooked very long), I have found that it is not necessary to blind bake this whole wheat pie crust in most instances.
Happy baking!